
티스토리 뷰
gRPC C# 환경설정 : https://petra.tistory.com/1754
https://www.youtube.com/watch?v=U8kTRj1wfPc&t=132s
위에 첨부된 소스코드는 로컬PC(서버, 클라이언트 동시 역활) 안에서 테스트한 코드이므로
네트워크 환경에서 테스트 할때는 서버 IP를 수정해야 한다.
위 유투브 영상을 따라서 프로젝트 만들때 주의할 점>

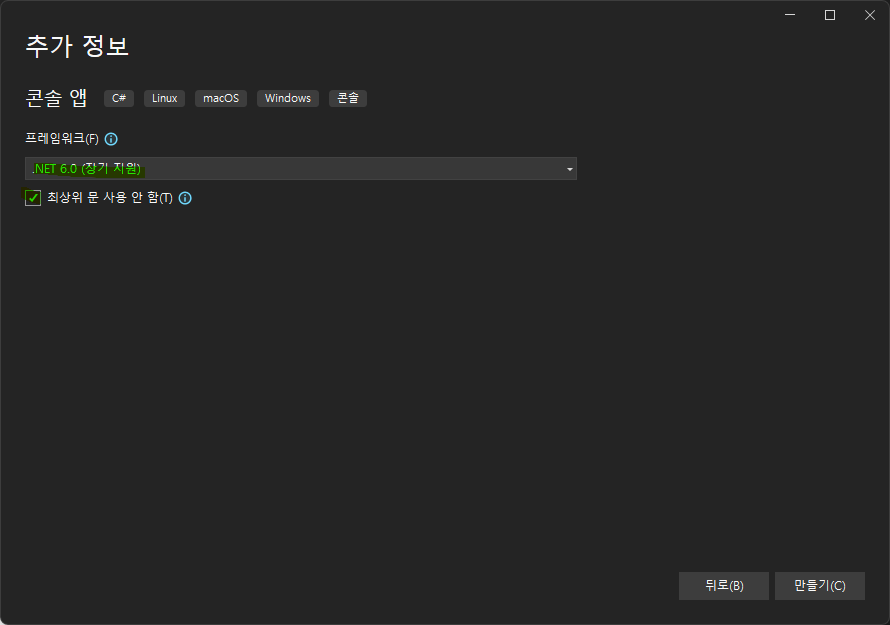
프로젝트 이름을 입력하고 다음 단계에서 "최상위 문 사용 안함" 을 체크하지 않고 만들면 프로젝트 만들고 Main함수가 있는 Progrma.cs 에서 Main함수가 안 보여 코드 수정이 어려우니 반드시 체크하고 만들어야 한다.

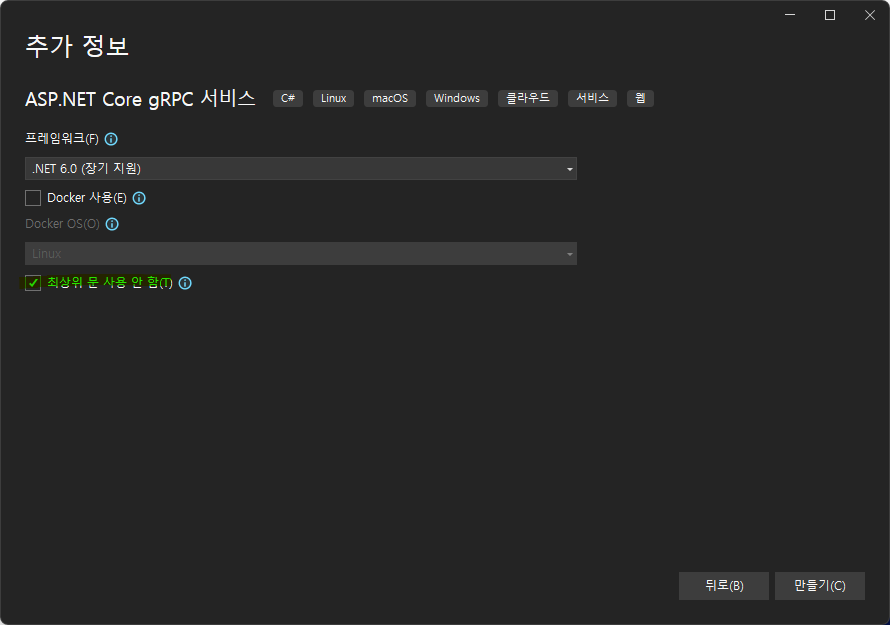
위 그림처럼 "최상위 문 사용 안함" 에 체크 표시해야만 아래 그림 7행 처럼 Main 함수 코드를 보여준다.

서버>

서버 프로젝트에서 NuGet패키지관리 팝업메뉴를 클릭한다.
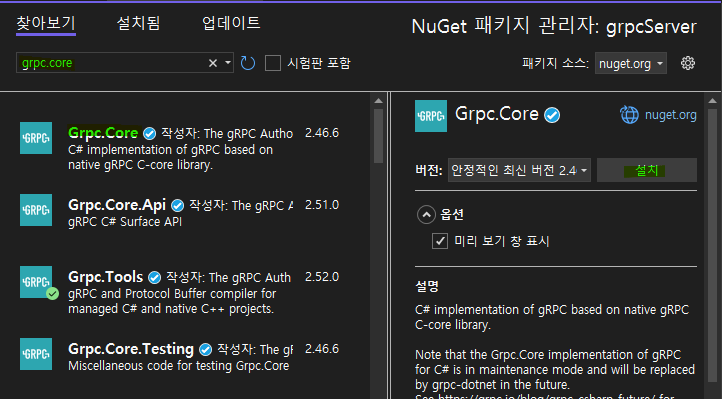
NuGet패키지 관리자에서 grpc.core 로 검색해서 검색된 Grpc.Core를 선택하고 설치를 한다.
Grpc.Core
Grpc.Tools
Goolgle.ProtoBuf
위 3가지 패키지를 설치하면 된다. (참고로, 서버는 Grpc.Core, 클라이언트는 Grpc.Net.Client 를 설치한다.)

솔루션 탐색기에서 추가된 패키지를 확인할 수 있다.
|
1
2
3
4
5
6
7
8
9
10
11
12
13
14
15
16
17
18
19
20
21
22
23
24
|
// GreeterService.cs
using Grpc.Core;
using GrpcService;
namespace GrpcService.Services
{
public class GreeterService : Greeter.GreeterBase
{
private readonly ILogger<GreeterService> _logger;
public GreeterService(ILogger<GreeterService> logger)
{
_logger = logger;
}
public override Task<HelloReply> SayHello(HelloRequest request, ServerCallContext context)
{
return Task.FromResult(new HelloReply
{
Message = "Hello " + request.Name
});
}
}
}
|
cs |
|
1
2
3
4
5
6
7
8
9
10
11
12
13
14
15
16
17
18
19
|
// grpcService.csproj
<Project Sdk="Microsoft.NET.Sdk.Web">
<PropertyGroup>
<TargetFramework>net6.0</TargetFramework>
<Nullable>enable</Nullable>
<ImplicitUsings>enable</ImplicitUsings>
</PropertyGroup>
<ItemGroup>
<Protobuf Include="Protos\greet.proto" GrpcServices="Server" />
</ItemGroup>
<ItemGroup>
<PackageReference Include="Grpc.AspNetCore" Version="2.40.0" />
</ItemGroup>
</Project>
|
cs |
C# 프로젝트 파일인 grpcService.csproj 에서 11~13행 처럼 서버로 지정해야 proto 파일이 컴파일 된다.
서버 launchSettings.json>
|
1
2
3
4
5
6
7
8
9
10
11
12
13
|
{
"profiles": {
"GrpcService": {
"commandName": "Project",
"dotnetRunMessages": true,
"launchBrowser": false,
"applicationUrl": "http://localhost:5290;https://localhost:7216",
"environmentVariables": {
"ASPNETCORE_ENVIRONMENT": "Development"
}
}
}
}
|
cs |
서버는 launchSettings.json 7행 처럼 https 1716번 포트를 통해 서비스한다.
응답으로 서버 코드 20행 처럼 클라이언트가 보내온 문자열 앞에 Hello 를 붙여 응답한다.

클라이언트>
클라이언트 프로젝트는 콘솔앱을 선택하고 다음 버튼 클릭한다.
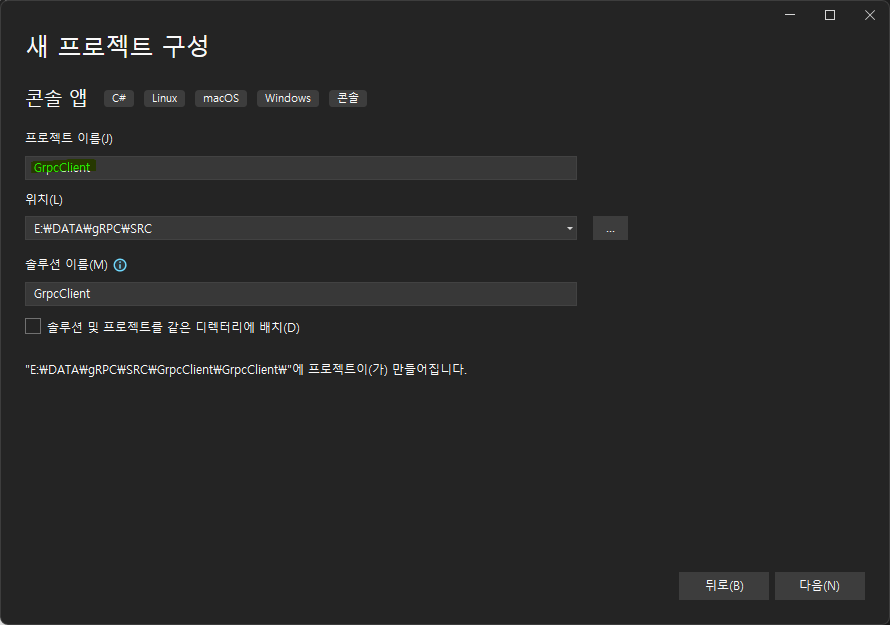
프로젝트 이름 입력하고 다음 버튼 클릭.
기본값으로 하고 만들기 버튼 클릭한다.

GrpcClient 프로젝트가 만들어지면 솔루션탐색기에서 GrpcClient 프로젝트 선택해서 팝업메뉴에서 Nuget 캐키지관리 메뉴를 클릭한다.

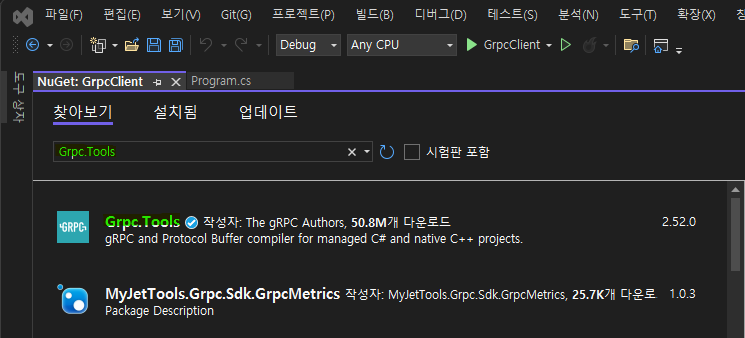
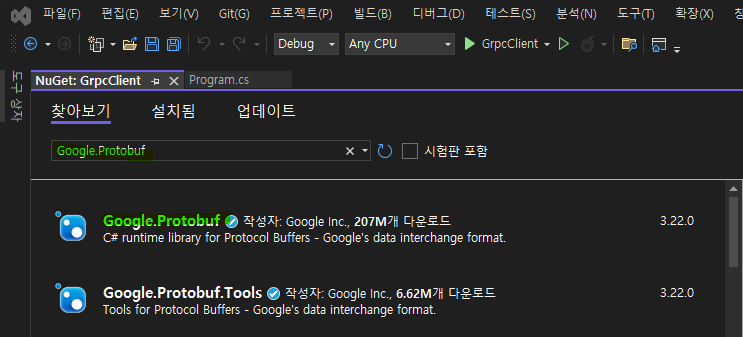
위 그림처럼 Nuget 패키지 관리자에서 찾아보기로 아래 3가지를 찾아 각각 설치한다.
grpc.net.client
grpc.Tools
google.Protobuf
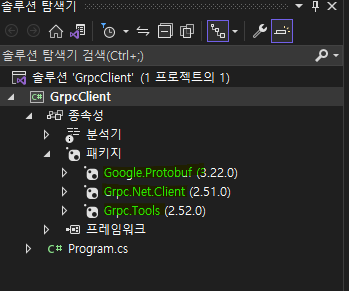
설치가 왼료되면 솔루션탐색기에서 설치된 패키지가 추가된다.
|
1
2
3
4
5
6
7
8
9
10
11
12
13
14
15
16
17
18
19
20
21
22
23
|
// GrpcClient.csproj
<Project Sdk="Microsoft.NET.Sdk">
<PropertyGroup>
<OutputType>Exe</OutputType>
<TargetFramework>net6.0</TargetFramework>
<ImplicitUsings>enable</ImplicitUsings>
<Nullable>enable</Nullable>
</PropertyGroup>
<ItemGroup>
<Protobuf Include="Protos\greet.proto" GrpcServices="Client" />
</ItemGroup>
<ItemGroup>
<PackageReference Include="Google.Protobuf" Version="3.21.12" />
<PackageReference Include="Grpc.Net.Client" Version="2.51.0" />
<PackageReference Include="Grpc.Tools" Version="2.51.0">
<PrivateAssets>all</PrivateAssets>
<IncludeAssets>runtime; build; native; contentfiles; analyzers; buildtransitive</IncludeAssets>
</PackageReference>
</ItemGroup>
</Project>
|
cs |
위 처럼 C# 클라이언트 프로젝트 파일에서 11~13행 처럼 Client 로 지정해야 proto 파일이 컴파일 된다.
|
1
2
3
4
5
6
7
8
9
10
11
12
13
14
15
16
17
18
19
20
21
22
23
|
// Program.cs
using Grpc.Net.Client;
namespace GrpcClient
{
internal class Program
{
static async Task Main(string[] args)
{
//Console.WriteLine("Hello, World!");
Console.WriteLine("Press any key cont...");
Console.ReadLine();
using var channel = GrpcChannel.ForAddress("https://localhost:7216");
var client = new Greeter.GreeterClient(channel);
var reply = await client.SayHelloAsync(new HelloRequest { Name= "GreeterClient" });
Console.WriteLine($"Greetings: :{reply.Message}");
Console.WriteLine("press any key to exit");
Console.ReadLine();
}
}
}
|
cs |
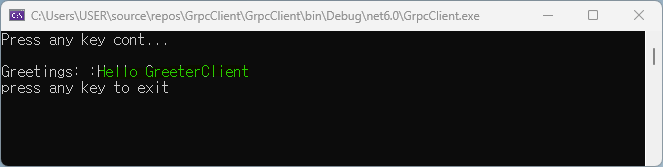
클라이언트는 https 7216번 포트를 통해 문자열 GreetClient 을 서버에 보내고, 서버에서 reply.Message 로 받은 문자열을 출력한다.
참고> 클라이언트에서 https 프로토콜 사용할때는 7216, http 프로토콜은 5290 로 연결해야 하며,
내부 네트워크에서 테스트 하기 위해 서버 launchSettings.json 코드의 7행을
http://192.168.100.200:5290;https://192.168.100.200:7216 로 수정해서 서버를 실행하면 아래와 그림과 같이 보안경고 창이 떠서 개인, 공용 네트워크 둘 다 체크 표시하고 액세스 허용해주면 된다.
클라이언트 코드 15행에서 http://192.168.100.200:5290 로 수정하고 실행하면 다른 PC의 클라이언트에서 서버로 연결이 가능하지만, https://192.168.100.200:7216 는 연결 거부 당한다.

서버 서비스 프로그램으로 간단하게 덧셈 연산을 하는 서버 서비스 프로그램을 만들어 본다.
프로젝트 이름은 아래 그림처럼 AddServer 로 한다.
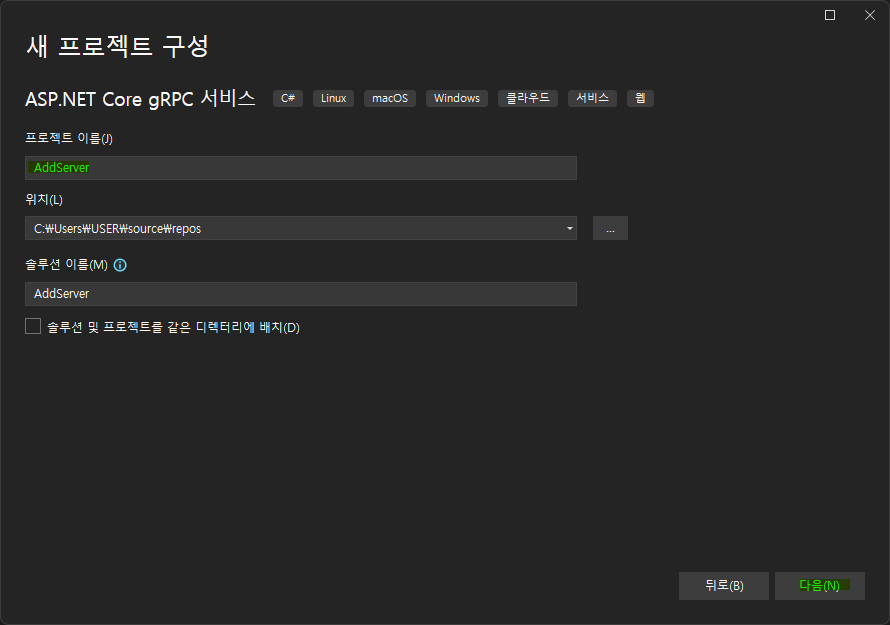
위 그림에서 다음 버튼 클릭한다.
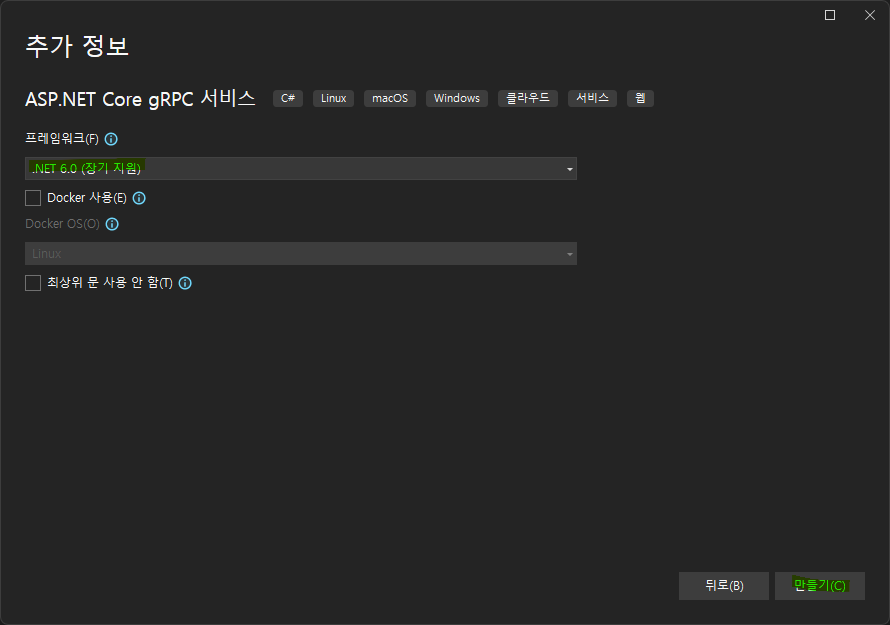
기본값으로 만들기를 클릭하면 아래 그림과 같이 AddServer 프로젝트가 만들어 진다.
